Excavating for Your Paver Project: Everything to Know

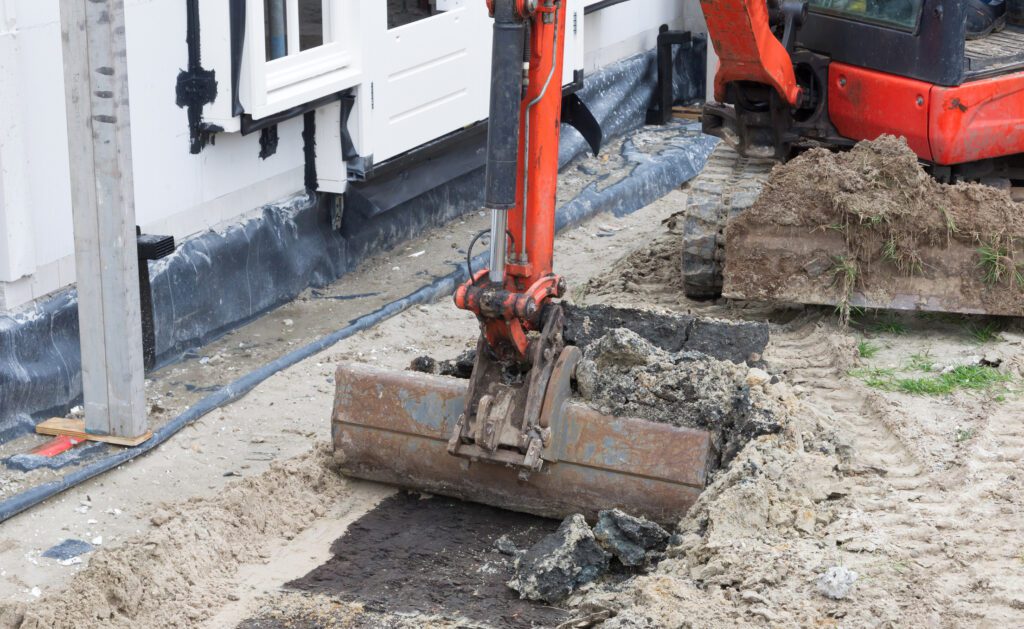
Proper excavation is the foundation of a successful paver project. It serves several crucial purposes: Excavation ensures a level and uniform base for the pavers. This is essential for aesthetics, as uneven surfaces can lead to tripping hazards and a visually unappealing result. Excavation allows for the installation of proper drainage systems, like gravel and perforated pipes, which prevent water from pooling or seeping under the pavers. Adequate drainage prevents erosion, heaving, and cracking. Excavation provides a stable foundation for the pavers, preventing settling or shifting over time. A well-excavated base ensures the pavers remain in place and can withstand the weight of foot traffic or vehicles. A well-excavated base allows for even load distribution. It ensures that the weight of foot traffic or vehicles is distributed uniformly across the pavers, reducing the risk of individual pavers cracking or breaking under pressure. Let’s dive beneath the surface to explore the essential first step in creating a paver patio: excavation. It’s the behind-the-scenes work that lays the groundwork for your outdoor retreat. In this guide, we’ll get down to the nitty-gritty of paver patio excavation, uncovering the practical steps and considerations that ensure your patio is not just a place to relax but a durable, long-lasting space to enjoy for years to come. Safety Precautions Safety gear and precautions are paramount when excavating for a paver project. Proper safety measures play a pivotal role in ensuring the well-being of everyone involved in the project. Excavation can involve heavy machinery, shovels, and digging tools, all of which pose potential risks to those on the job site. Therefore, wearing the appropriate safety gear is essential. This includes items like hard hats, steel-toed boots, gloves, and eye protection. These measures help protect individuals from accidents and injuries that can occur during the excavation process. Additionally, it’s essential to locate underground utilities such as gas, water, sewer, and electric lines before starting any excavation. Failure to do so can lead to severe accidents, including gas leaks or electrical hazards. Calling local utility companies or using utility locating services is a standard practice to identify and mark these lines before digging begins. Safety also extends to environmental concerns. Proper disposal of excavated soil and construction debris, following local regulations, ensures environmental responsibility and minimizes pollution risks. Lastly, machinery used in excavation should be operated by trained personnel who are aware of safety protocols. Regular equipment maintenance and inspections are essential to prevent accidents due to equipment failure. Equipment and Tools Marking and Layout To establish the desired layout and dimensions for excavation in a paver project, the use of stakes and strings is a fundamental process. Here’s a step-by-step guide on how to do it effectively: By using stakes and strings to establish your project’s layout and dimensions, you create a precise guide for excavation. It not only ensures that your paver installation is square and accurately sized but also allows you to check for proper slope and drainage during this crucial stage. Correctly graded and sloped surfaces will prevent water from pooling and ensure the long-term durability of your paver project. Excavation Depth Determining the required excavation depth for your paver project is a critical step in ensuring its longevity and stability. The depth of excavation depends on several factors, including the type of pavers you’re using, the base materials, and any additional features like edging. The first consideration is the type of pavers you’ve selected. Different pavers have varying thicknesses, and this thickness plays a role in how deep you need to excavate. Common paver thicknesses include 2 3/8 inches, 2 3/4 inches, and 3 1/8 inches. The rule of thumb is to excavate to a depth that accommodates the paver thickness plus an additional 1 to 1.5 inches for the base material. For instance, if you’re using 2 3/8-inch-thick pavers, you’d excavate to a depth of 3.5 to 4 inches. The second factor is the type of base material you’re using. Typically, a base material like crushed stone or gravel is used to create a stable foundation for the pavers. The depth of this base material can vary based on factors such as soil type and the intended use of the paver area. For residential projects, a common recommendation is to excavate to a depth of 6 to 8 inches for the base material. However, in areas with poor soil drainage, you may need to go deeper. Uniform excavation depth is crucial for achieving a level surface. Inconsistent depths can result in pavers that are uneven, creating tripping hazards and an unattractive finish. To maintain uniformity, use a string level or laser level to ensure that the base material is evenly distributed and compacted to the desired depth across the entire project area. Excavation Process The excavation process for a paver project involves several steps, with the use of an excavator to dig out the soil to the desired depth being a critical component. Here’s a detailed overview of the excavation process, highlighting the importance of regular measurements and adjustments for accuracy: Regular measurements and adjustments during the excavation process are crucial to achieving the desired depth and ensuring a level and properly graded surface for your paver project. By maintaining accuracy throughout this critical phase, you set the stage for a successful and long-lasting paver installation. Final Grading A final grading step is essential in any landscaping or construction project, especially for paver installations, to ensure proper slope and drainage away from structures. Proper grading helps prevent water from pooling and ensures that rainwater flows away from your home or other critical areas. Here’s why final grading is crucial and how a grading rake can be a valuable tool in this process: Importance of Final Grading: Inspection A thorough inspection of the excavated area is an essential step in any construction or landscaping project, and its significance cannot be overstated. This inspection is crucial to identify and rectify any irregularities or issues that may have occurred during the excavation phase. Here’s
How To Install a French Drain

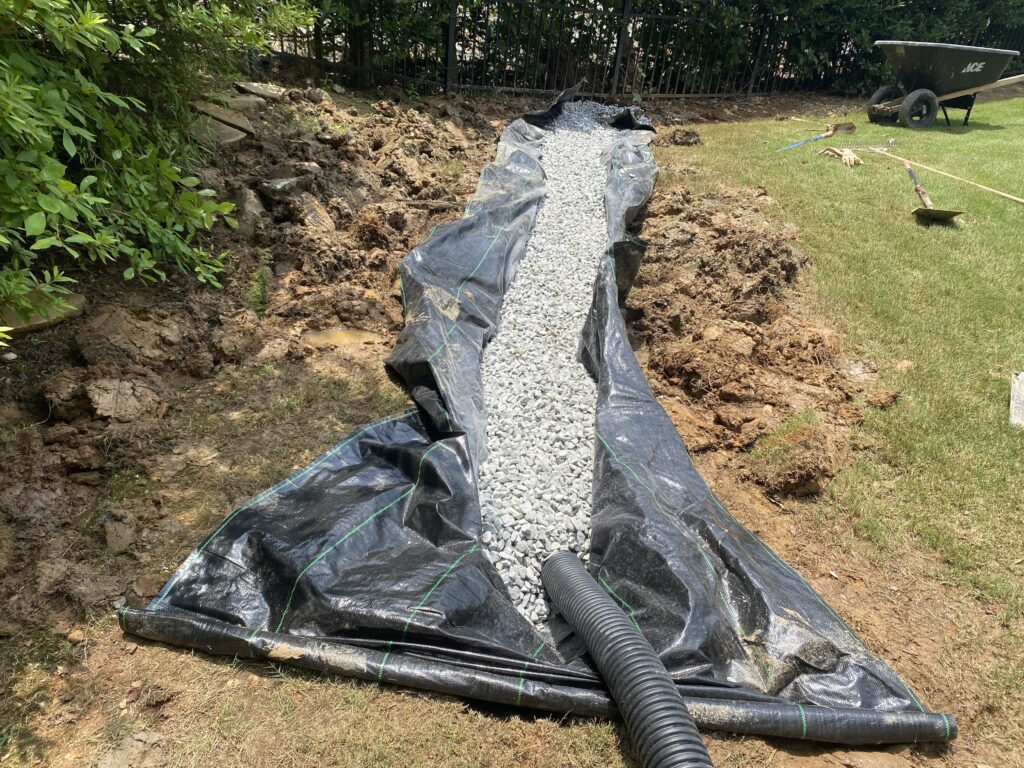
French drains, often heralded as the unsung heroes of effective drainage solutions, not only keep excess water at bay but also add an element of aesthetic organization to your surroundings. As a homeowner, you’ve likely pondered the idea of installing one of these ingenious systems, and here we present you with a comprehensive guide to demystify the process. When is a French Drain a Necessity? Essential Tools and Materials for French Drain Installation Before delving into the installation process, gather the necessary tools and materials: Step 1: Assess Underground Safety Start by thoroughly examining your underground environment. Be aware of the locations of wires, pipelines, and installations to avoid accidentally damaging them during excavation. Ensure there is ample space for the drainage system, keeping it at least one meter away from walls and fences to prevent future complications. Consider potential obstacles like tree roots and vegetation. Assess water sources, their volume, and whether they might be contaminated. Step 2: Check for Zoning Restrictions Some areas have restrictions on excavation and construction. Consult with local authorities to ensure compliance. While it may seem tedious, maintaining good relations with legal institutions is always beneficial. Additionally, discuss your plans with neighbors to avoid any disputes regarding water runoff onto their properties. Step 3: Determine the Ideal Slope For a French drain to function optimally, it must be installed on a downward slope to facilitate natural water flow away from the problematic area. If a natural slope is absent, you may need to create one. The general rule is 1 inch of slope for every ten feet of length. Consult with experts or surveyors if you’re uncertain about the slope’s adequacy. Step 4: Excavate the Trench Excavation is a critical step. The trench for a French drain is typically 6 inches wide and 18-24 inches deep. A trencher is the most efficient tool for this task, although it may require professional handling. If you opt for manual excavation, it will demand substantial effort. Size the trench according to your drainage needs and equipment dimensions. Step 5: Lay Landscape Fabric Once excavation is complete, line the trench with water-permeable landscape fabric. Leave at least 10 inches on either side to accommodate expansion. This fabric will prevent soil from entering the drain while allowing water to pass through. Step 6: Add Gravel Base Spread 2-3 inches of drainage rock evenly over the landscape fabric. This rock layer serves as the foundation for the drain. Step 7: Place Corrugated Drain Pipe Position the corrugated drain pipe atop the gravel, ensuring that drainage holes face downwards for optimal performance. Step 8: Cover with Drainage Rock Add more gravel to cover the pipe, leaving 3-5 inches of space between the gravel’s top and the trench’s surface. This prevents debris from entering the drain while promoting water flow. Step 9: Secure Landscape Fabric Fold any excess landscape fabric over the gravel to prevent soil intrusion while facilitating water passage. Step 10: Complete the Trench Refill the remaining trench with displaced soil. You can opt to lay sod or decorative stones over the trench for a more visually appealing finish. If you choose the latter, consider adding a curve to enhance aesthetics. In Conclusion These comprehensive steps empower you to install a French drain effectively. While it’s possible to undertake this project on your own, seeking professional assistance is advisable for optimal results. Whether you choose DIY or professional installation, this guide equips you to improve your outdoor space and manage excess water efficiently.
