How to Choose Paver Colors for Your House Like a Pro
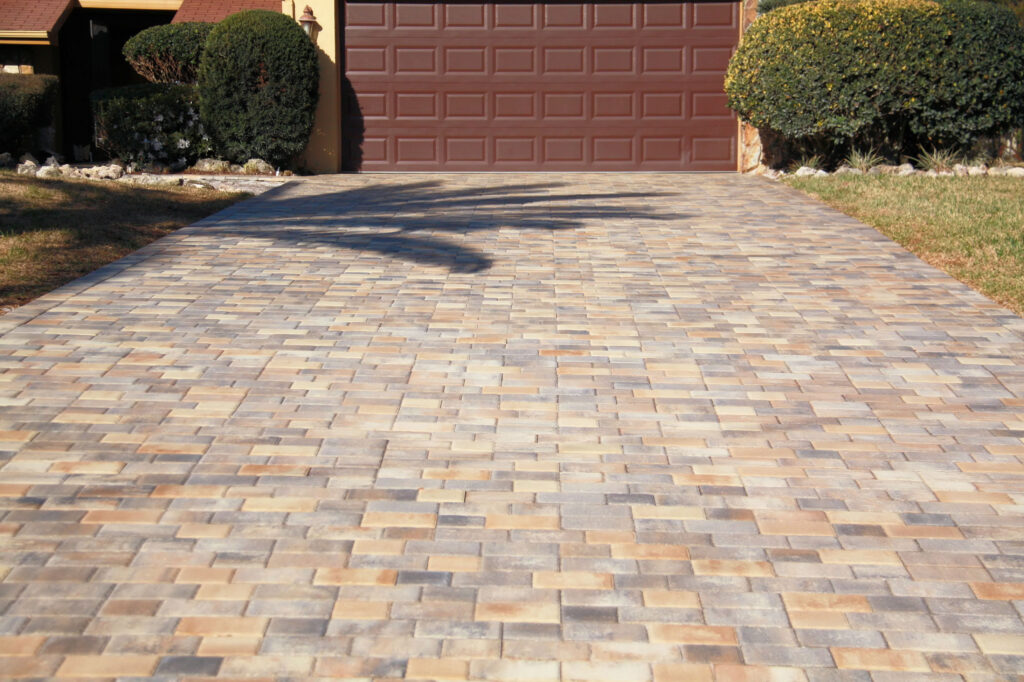
The curb appeal of your home extends beyond the paint color and manicured lawn. The pathway that leads to your doorstep, the patio where you unwind on balmy evenings, the driveway that welcomes guests – these elements, often paved with intention, create a visual narrative that speaks volumes about your taste and style. If you’re thinking of a paver patio, walkway, or driveway, then you have probably seen the flood of options available to you. If you want to choose paver colors that bring out the best in your home, then you’ll have to delve deeper than simply “matching” your house color. While a cohesive look is desirable, a one-dimensional approach can leave your outdoor space feeling flat and uninspired. Instead, we’ll explore the art of coordination, understanding how to harmonize with your house’s undertone (warm or cool) and existing architectural elements like the roof. We’ll unpack the psychology of color, revealing how lighter pavers create a sense of spaciousness, while warmer tones cultivate coziness, and darker shades add a touch of drama and definition. Whether you envision a sleek and modern walkway leading to your minimalist masterpiece or a rustic patio that evokes a sense of warmth and togetherness, this guide will empower you to translate your vision into reality. Coordination vs. Matching When it comes to choosing the perfect paver color for your house, there’s a delicate balance between coordination and direct matching. While it might seem intuitive to match the paver color exactly to your house’s exterior, this isn’t always the best approach. Here’s why: Coordinating Paver Color with Your House’s Undertone (Warm or Cool Colors) Now, let’s talk about undertones. Every house color has undertones, which can be either warm or cool. These undertones play a crucial role in determining the overall feel and mood of your home’s exterior. By understanding the distinction between coordination and direct matching, as well as considering your house’s undertones, you can confidently choose the perfect paver color that enhances the beauty of your home while adding curb appeal that lasts for years to come. Color Strategies to Choose Paver Colors Your roof is a prominent feature of your home’s exterior, so it makes sense to consider its color when choosing pavers. Here’s how selecting the right paver color can complement your roof and achieve a unified look: By carefully coordinating your paver color with your roof, you can achieve a unified and polished look that elevates the overall appearance of your home. Using Contrasting Colors Contrast is a powerful tool in design, and when used effectively, it can highlight the beauty of your home’s exterior. Here’s how you can use contrasting pavers to accentuate your house’s color: By strategically using contrasting pavers, you can add depth, dimension, and personality to your home’s exterior, creating a visually stunning and dynamic outdoor space. Light and Space Considerations The color of your pavers can significantly impact the perceived size and feel of your outdoor space. Here’s how to use color to achieve the desired effect: Lighter Colors: Create Spaciousness and Airiness Light-colored pavers, like beige, cream, or soft gray, are highly reflective. They bounce back more sunlight, making your patio, walkway, or driveway appear visually larger and more open. This is particularly beneficial for smaller outdoor spaces where you want to create an illusion of more room. Lighter colored pavers can also brighten up shady areas and create a clean, airy feel. Warmer Colors: Invite Comfort and Coziness Warmer toned pavers, like tans, browns, and terracotta, absorb more sunlight. This creates a sense of warmth and intimacy in your outdoor space. Warm colors are ideal for patios and walkways where relaxation and entertaining are the primary focus. They set a casual and inviting tone, perfect for spending quality time with family and friends. Warmer tones can also complement natural elements like wood decks or pergolas, creating a cohesive and rustic feel. Darker Colors: Add Definition and Drama Darker colored pavers, like charcoal gray or dark brown, absorb the most light. This creates a bold statement and visually defines pathways and entrances. Darker colors can add a touch of sophistication and drama to your outdoor space. They can be particularly effective for creating a formal or elegant look for grand entrances or large patios. However, it’s important to consider the size of your space. Using dark pavers in a small area can make it feel even more confined. They work best in larger outdoor areas where they can add definition without overwhelming the space. Pro Tips for Choosing Your Paver Color By following these tips, you’ll be well on your way to selecting the perfect paver color that complements your house and enhances your outdoor space! Conclusion Choosing the perfect paver color for your home is not just about aesthetics; it’s about crafting an outdoor space that reflects your personality and complements your lifestyle. By understanding the interplay of color, light, and space, you can create a welcoming and functional extension of your home. Remember, the pavers you choose set the stage for countless memories – laughter shared with friends on a sunny patio, quiet evenings spent stargazing, and the joyful pitter-patter of little feet along a vibrant walkway. Don’t be afraid to experiment, to mix and match tones, or to seek guidance from professionals. The key is to find a color combination that resonates with you and creates a space that beckons you to step outside and embrace the beauty of your surroundings.
How Can I Make My Backyard Relaxing?
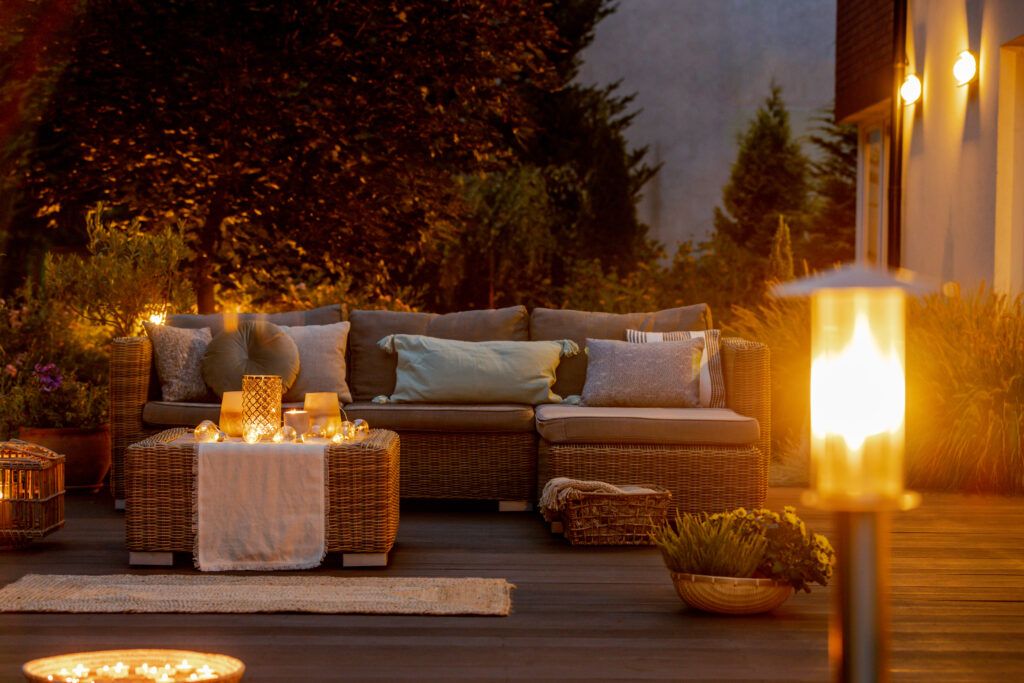
Do you dream of transforming your backyard into a personal oasis of tranquility? Imagine kicking back in a comfy hammock, surrounded by the calming sounds of nature, and letting all your stress melt away. Creating a relaxing backyard retreat is easier than you might think! This guide will equip you with all the inspiration and information you need to turn your backyard into a haven for relaxation and rejuvenation. From creating comfortable seating areas to incorporating the soothing sounds of water, we’ll explore a variety of ideas to suit your style and budget. So, grab your favorite beverage, put on your comfy clothes, and get ready to discover how to make your backyard the ultimate relaxation destination. Dedicated Relaxation Features Incorporating dedicated relaxation features into your backyard goes beyond simply adding a few chairs and a patio umbrella. It’s about creating a holistic experience that engages all the senses and fosters a sense of calm. From the soft sounds of nature to the luxurious comfort of plush seating, every element is meticulously chosen to promote relaxation and rejuvenation. Creating a Space for Mindfulness: Installing a Fire Pit or Outdoor Fireplace for Cozy Gatherings: Adding Features for Recreation: Creating a Comfortable Seating Area When it comes to crafting a relaxing backyard, one of the fundamental elements is the seating area. After all, what’s better than sinking into a cozy chair or stretching out on a hammock after a long day? Let’s delve into why comfortable seating is crucial for truly unwinding in your outdoor space and explore some fantastic options to consider. There’s a reason why comfort is often synonymous with relaxation. Comfortable furniture not only provides physical support but also promotes mental ease. When you have inviting seating options in your backyard, it becomes a beckoning haven where you can escape the stresses of the day, kick back, and recharge. Whether it’s enjoying a good book, sipping your morning coffee, or stargazing at night, comfortable seating sets the stage for blissful moments outdoors. Options to Explore: When planning your seating area, it’s essential to take into account the sun’s trajectory throughout the day and how it will impact your comfort. While some may relish basking in the sunlight, others might prefer shaded spots to avoid overheating or sunburn. Position your seating arrangements strategically, considering options for both sun-drenched and shaded areas. Utilize umbrellas, pergolas, or strategically planted trees to provide relief from the sun’s intensity, ensuring that your outdoor oasis remains inviting and comfortable throughout the day. Creating a Green Serene with Plants Greenery has a remarkable ability to transform your space, infusing it with tranquility and natural beauty. By strategically incorporating plants into your backyard oasis, you can create a serene environment that soothes your soul and rejuvenates your spirit. There’s a reason why spending time in nature feels so invigorating and calming—it’s the healing power of plants. Research has shown that simply being surrounded by greenery can reduce your stress, improve your mood, and enhance your overall well-being. Whether it’s the vibrant hues of flowers, the lush foliage of shrubs, or the graceful canopy of trees, each element adds its unique touch of serenity to your backyard sanctuary. Before diving into your landscape design, it’s essential to consider the specific conditions of your backyard, including your climate, sun exposure, and shade levels. Selecting plants that thrive in your local climate ensures their long-term health and vitality. Take note of the sun and shade patterns throughout the day to determine which areas of your backyard are suitable for different types of plants. The Calming Sounds of Water Water features are a fantastic way to introduce a sense of tranquility and relaxation into your backyard oasis. The gentle sounds of trickling water have a well-documented stress-reducing effect, creating a peaceful ambiance that can help you unwind and de-stress. Here are some water feature ideas to consider for your backyard: Here are some additional tips for incorporating water features into your backyard: Fostering Privacy and Seclusion Feeling secluded and having a sense of privacy are essential for creating a truly relaxing backyard retreat. When you can unwind without feeling like you’re on display, it allows you to de-stress and fully enjoy your outdoor space. Here are some ways to foster privacy and seclusion in your backyard: Adding Personal Touches Now it’s time to infuse your backyard retreat with your own personal style, making it a reflection of your unique taste and personality. By adding those special touches, you can elevate your outdoor space from ordinary to extraordinary, creating a haven that speaks to your heart and soul. Let’s explore some ideas for adding those personal flourishes that will make your backyard oasis truly one-of-a-kind. Make Your Backyard Retreat Unique and Reflect Your Style: Your backyard should be an extension of your home, a place where you feel completely at ease and surrounded by elements that resonate with you. Take this opportunity to inject your personality into every corner of your outdoor sanctuary. Whether you’re drawn to modern minimalism, bohemian chic, or rustic charm, there are endless ways to tailor your backyard to suit your style preferences. Outdoor Rugs, Throw Pillows, Wind Chimes, Small Sculptures: Start by layering in elements that add comfort and character to your outdoor space. Outdoor rugs not only define seating areas but also add warmth and texture to your patio or deck. Scatter throw pillows in your favorite colors and patterns across your seating area to create a cozy atmosphere and provide extra comfort for lounging. Hang wind chimes or small sculptures to add a touch of whimsy and intrigue, filling your backyard with soothing sounds and visual delights. Anything That Brings You Joy and Relaxation: The key is to surround yourself with things that bring you joy and relaxation. Whether it’s a collection of potted plants that remind you of your favorite botanical garden, a vintage bench passed down through generations, or a quirky garden gnome that never fails to make you smile, let your
How to Choose Patio Size, What Size You Need
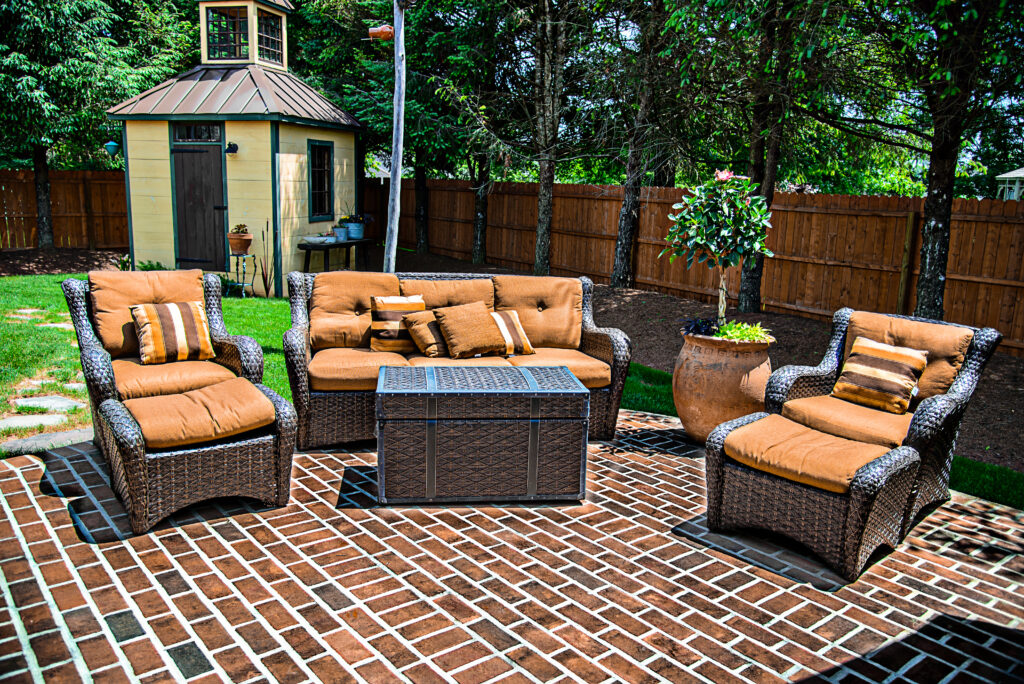
Choosing the right patio size is crucial to maximizing the functionality and enjoyment of your outdoor haven. A patio that’s too small can feel cramped and limit your ability to entertain or unwind, while an oversized patio might overwhelm your yard and disrupt the overall flow of your property. In this guide, we’ll walk you through the key considerations for determining the perfect patio dimensions to create a backyard retreat you’ll love. For an outdoor living space, one huge decision is choosing the right patio size. This choice shapes how you’ll use and enjoy your outdoor space. It’s about creating a patio that fits your lifestyle and makes your backyard feel like an extension of your home. Join us as we explore the importance of picking the perfect patio dimensions. From practical functionality to simply making the most of your outdoor experience, we’ll guide you through the process of crafting your ideal backyard retreat. Let’s dive into the world of outdoor living and discover how to create a patio that’s just right for you. Assessing Your Needs and Lifestyle: Don’t Build a Patio for Ants (Unless You’re an Ant) Before you grab the measuring tape and start planning your Roman Colosseum-sized patio, take a step back and consider your actual needs. This will guide you towards the ideal size that fosters both functionality and enjoyment in your outdoor haven. Considerations: Lifestyle Shenanigans: Beyond the basics, consider how your hobbies and activities might influence patio size. Do you enjoy hosting barbecues? Envision an outdoor kitchen taking center stage, requiring additional space for appliances and prep areas. Are you a hot tub enthusiast? Don’t forget to account for the footprint of the tub and the surrounding lounging area – because nobody wants to hot tub like sardines. Don’t forget about future needs either! If you plan on expanding your family or envisioning a growing love for outdoor entertaining, choosing a slightly larger patio size can accommodate these potential changes. Understanding Patio Layout and Design Principles: Architectural Considerations for Spatial Harmony Moving beyond the initial size determination, crafting a truly functional and aesthetically pleasing patio requires an understanding of fundamental layout and design principles. Here, we delve into the architectural considerations that ensure your patio integrates seamlessly with your overall property. Space Planning: Optimizing Flow and Functionality A well-designed patio should function as an extension of your living space, fostering seamless movement and interaction between the indoors and outdoors. Space planning becomes paramount, requiring meticulous consideration of traffic flow. Imagine designated walkways that allow for comfortable movement between key areas, such as the patio entrance, dining space, and grilling station. Furniture placement is equally crucial. Ensure adequate clearance around furniture to avoid congested pathways or awkward maneuvering. Finally, integrate your patio with existing landscape features. Mature trees can provide valuable shade, but their root systems should be factored into the design to prevent future foundation issues with your patio. Proportions and Scale: Achieving Visual Balance Similar to the way architects strive for harmony between a building’s scale and its surroundings, patio dimensions should be carefully considered in relation to the overall property. A patio that is disproportionately small relative to the size of your house and yard can appear out of place and visually insignificant. Conversely, a patio that dominates the yard can create an overwhelming feeling of enclosure and disrupt the intended balance between hardscape and softscape elements. Architectural styles also play a role. A sprawling ranch-style home might benefit from a larger, more open patio that complements its horizontal lines. In contrast, a quaint cottage might be better suited to a more intimate patio space that echoes its cozy proportions. By carefully considering these principles, you can ensure your patio becomes a cohesive and visually appealing element within the broader architectural context of your property. Standard Sizes: A Starting Point for Planning Now that you’ve considered your lifestyle needs and design principles, it’s time to translate that knowledge into actionable steps. This section provides a roadmap for determining the ideal patio size for your backyard haven. While there’s no one-size-fits-all solution, common patio dimensions offer a helpful starting point for your planning process. Here’s a breakdown of standard sizes based on primary function: Remember, these are just starting points! The beauty of a custom patio lies in its ability to be tailored to your specific needs and preferences. Conclusion Choosing the right patio size is a crucial first step in crafting your personal backyard oasis. By considering your needs and lifestyle, incorporating design principles for optimal flow and functionality, and factoring in practicalities like material costs and maintenance, you can arrive at the ideal dimensions for your space. Remember, the perfect patio strikes a balance between functionality, aesthetics, and budget. Don’t be afraid to get creative! Utilize the insights gained from this guide to tailor your patio to your unique vision. Explore creative solutions, consider a combination of materials, and most importantly, have fun with the process. With careful planning and a touch of your personal style, you can transform your backyard into a space that fosters relaxation, connection, and countless happy memories. So, grab your measuring tape, unleash your creativity, and get ready to build the patio of your dreams – a haven that enhances your lifestyle and brings you joy for years to come.
How to Make Your Yard Private Without a Fence
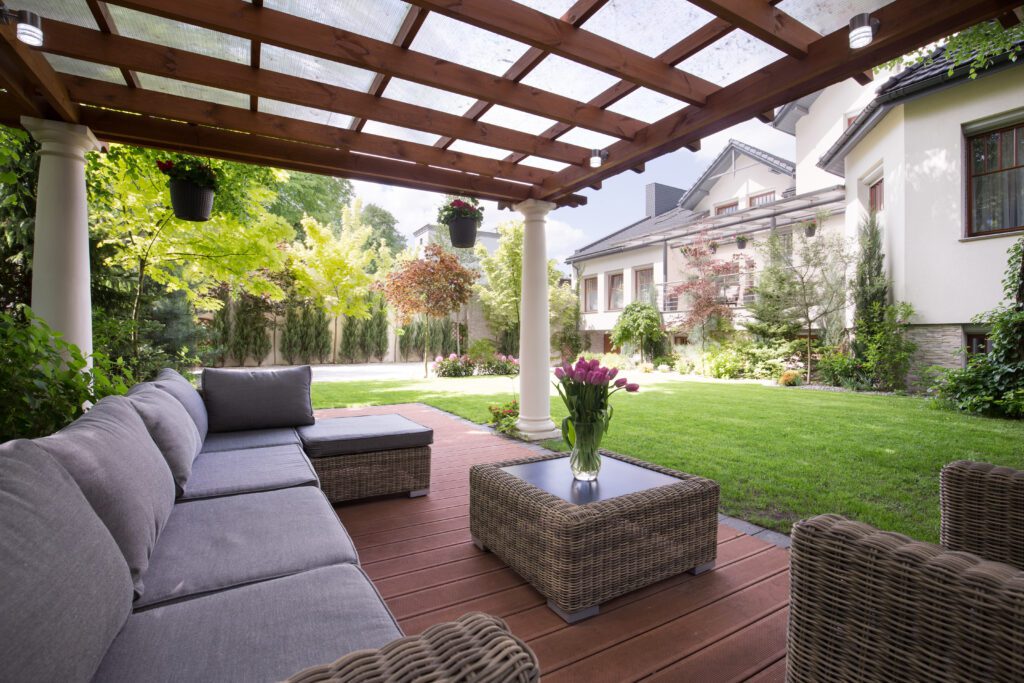
Your backyard is more than just an outdoor space; it’s a haven for relaxation, entertainment, and connection with nature. But what happens when you crave privacy without the starkness of a traditional fence? How can you create seclusion and intimacy while maintaining the beauty and openness of your outdoor retreat? In this article, we embark on a journey to unlock the secrets of transforming your backyard into a private sanctuary without the need for imposing barriers. From lush greenery to innovative structures and creative solutions, we’ll explore a myriad of techniques and strategies to help you reclaim your outdoor space and make it private without a fence. So, step into your backyard paradise and let’s discover together how to make it a haven of privacy, serenity, and natural beauty – without a fence. Go Green with Privacy Plants In the quest for backyard privacy, nothing quite rivals the elegance and charm of utilizing plants. Not only do they offer a natural solution, but they also add beauty, fragrance, and biodiversity to your outdoor space. Let’s delve into the world of privacy plants and discover how they can transform your backyard into a secluded paradise. Suggested Types of Plants: Considerations for Plant Selection: By carefully selecting and integrating privacy plants into your backyard landscape, you can enjoy both seclusion and natural beauty in your outdoor sanctuary. So, go ahead, embrace the greenery, and create a tranquil retreat where you can unwind and reconnect with nature. Create Defined Spaces with Structures Recently we worked with a homeowner who we helped transform their backyard into a private entertaining area using a pergola adorned with climbing vines. By strategically placing the pergola near their patio, we created a cozy alcove where guests could relax and unwind away from prying eyes. The lush foliage of the vines provided natural privacy while adding beauty and greenery to the space. With the addition of comfortable seating, ambient lighting, and a built-in sound system, the pergola became the focal point of outdoor gatherings, blending seamlessly with the surrounding landscape and offering a retreat-like atmosphere for hosting memorable moments with family and friends. When it comes to transforming your backyard into a private retreat, structures play a crucial role in not only providing privacy but also enhancing functionality and aesthetic appeal. Let’s explore how various structures can delineate and define your outdoor space, offering both practicality and style. Questions to Consider: Water Features as Privacy Screens Water features offer a dual purpose in backyard design, not only adding tranquility and beauty but also serving as effective privacy screens. By strategically incorporating water elements into your outdoor space, you can create a serene ambiance while ensuring privacy from neighboring properties. You can seamlessly integrate water features into their existing landscaping by assessing your outdoor space’s layout and aesthetic. For example, a fountain can be nestled within a garden bed, while a pond can be positioned as a focal point in a lawn area. Consider the existing plants, terrain, and overall design theme when selecting and placing water features to ensure harmony and cohesion in the landscape design. By thoughtfully selecting and positioning water features in your backyard, you can achieve both privacy and tranquility in your outdoor sanctuary. Whether it’s the gentle trickle of a fountain or the soothing cascade of a waterfall, water elements add a touch of elegance and serenity while creating a secluded retreat for relaxation and contemplation. Creative Solutions for Privacy Without a Fence When traditional fencing isn’t an option, homeowners can turn to creative solutions like screens and curtains to achieve privacy in their yards. These alternative options offer flexibility, aesthetic appeal, and can be tailored to suit various outdoor spaces. By exploring the creative potential of screens and curtains, homeowners can transform their yards into private retreats that reflect their unique style and personality. Whether it’s the rustic charm of wooden dividers or the contemporary flair of metal screens, these alternative solutions offer endless possibilities for enhancing privacy and beauty in outdoor living spaces. Conclusion Transforming your backyard into a private haven without a fence is an achievable and rewarding endeavor. By strategically incorporating landscaping elements, creative structures, and thoughtful design techniques, you can cultivate a space that feels secluded, inviting, and uniquely your own. Remember, the possibilities are endless! Don’t be afraid to unleash your creativity and personalize your backyard oasis to reflect your style and preferences. For those seeking expert guidance, consider consulting a landscape designer who can create a customized plan tailored to your specific needs and backyard layout. Additionally, a visit to your local nursery can provide valuable assistance in selecting the perfect plants to bring your privacy vision to life. With a little planning and effort, you can turn your backyard into a tranquil sanctuary where you can relax, unwind, and enjoy the outdoors in complete privacy. So, get started today and embrace the beauty of your own private backyard paradise!
How To Choose The Best Landscape Design Company
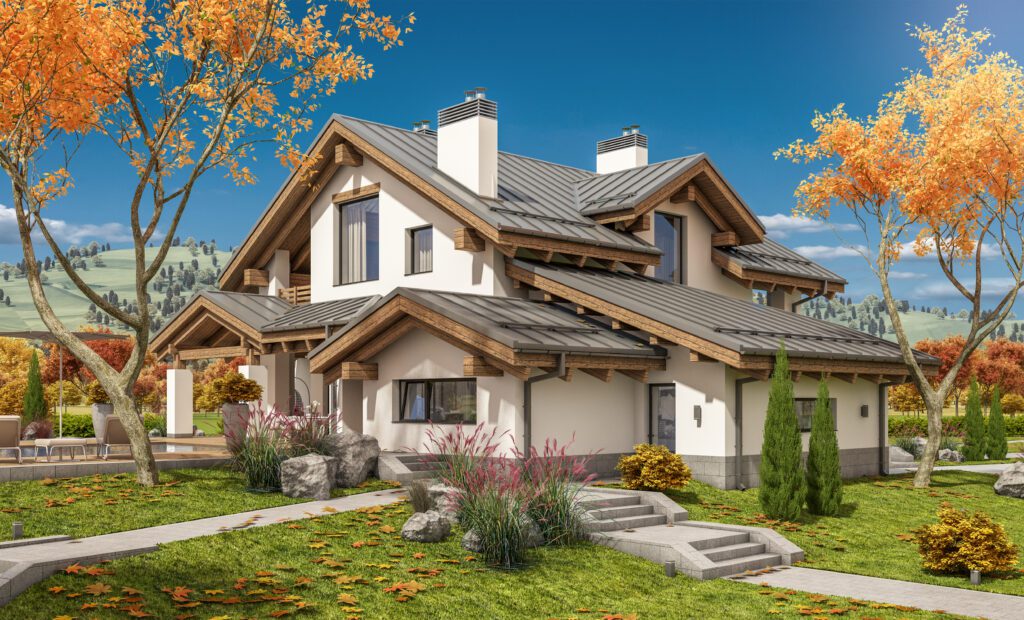
Whether you’re picturing a peaceful garden retreat or a lively backyard paradise, you need to choose the best landscape design company for the job. But with so many options out there, picking the perfect one can feel like searching for a needle in a haystack. Don’t worry! In this guide, we’ll break down the process into easy-to-follow steps. From figuring out what you want to finding the right match, we’ll walk you through everything you need to know to turn your outdoor dreams into reality. So, grab a seat and let’s start planning your perfect landscape together! Know What You Want: Having a Clear Vision for Your Dream Landscape Before diving headfirst into quotes and consultations with landscape design companies, take a step back and solidify your vision. A clear understanding of your landscaping needs will act as a roadmap for the entire project, ensuring you and your chosen company are on the same page from the get-go. Here’s how to define your desires: By taking the time to solidify your vision, you’ll be well-equipped to choose the landscape design company that best translates your dreams into a reality. With a clear understanding of your needs, you’ll receive targeted proposals, avoid potential misunderstandings, and ultimately end up with a stunning outdoor space that reflects your unique style and desires. Research and Recommendations: Narrowing Down the Best Landscape Design Companies Once you’ve pinned down your landscape design vision, it’s time to find the company that can bring it to life. The hunt for the perfect landscape design company involves a two-pronged approach: leveraging the power of online research and tapping into the wisdom of your network. Harness the Power of the Web: Tap into Your Network: Look for the Right Fit: As you research different companies, prioritize those that: Check Qualifications and Experience: Partnering with Expertise With a shortlist of potential landscape design companies in hand, it’s time to delve deeper into their qualifications and experience. This step ensures you’re partnering with a company that possesses the expertise to deliver a project that not only meets your vision but also adheres to safety standards and regulations. Verifying Credentials: Assessing Experience: Beyond Credentials: By thoroughly checking qualifications, experience, and references, you’ll gain valuable insights into the company’s capabilities and professionalism. This crucial step ensures you choose a landscape design company with the expertise, experience, and commitment to quality necessary to transform your dream landscape into a reality. Get Multiple Quotes: Making an Informed Decision Once you’ve identified a few qualified landscape design companies that resonate with your vision, it’s time to gather quotes. Obtaining estimates from several companies allows you to compare pricing structures, the quality of service offered, and the overall value proposition. Shop Around, Don’t Settle: Comparing Apples to Apples: Beyond the Bottom Line: Understand the Process By obtaining detailed quotes from multiple companies, you gain valuable insights into pricing structures, service offerings, and the overall value each company brings to the table. This crucial step empowers you to make an informed decision and select the landscape design company that best aligns with your budget, vision, and long-term goals for your dream outdoor space. Understanding the process is paramount when engaging with a landscape design company. One essential aspect of this understanding is insisting on a comprehensive written contract that leaves no room for ambiguity. This contract should meticulously outline all responsibilities, costs, timelines, installation standards, and guarantees involved in the project. Before proceeding, take the time to thoroughly review this document. Ensure that each detail is crystal clear and that there are no misunderstandings regarding what is expected from both parties. This includes not only the financial aspects but also the timeline for completion, the quality standards to be met, and any warranties or guarantees provided by the company. By having a detailed contract in place, you can protect yourself from potential disputes or misunderstandings down the line. It serves as a roadmap for the project, providing clarity and accountability for all involved parties. Additionally, make sure you fully understand every step of the design and build process outlined in the contract. If there are any terms or procedures that seem unclear, don’t hesitate to ask for clarification from the landscape design company. You should feel confident in your understanding of how the project will unfold from start to finish before giving the green light to proceed. Remember, a well-defined contract and a clear understanding of the process are essential foundations for a successful collaboration with your landscape design company. So, insist on clarity, ask questions, and ensure that you’re on the same page every step of the way. Request a Job Site Visit This one is my favorite, it’s a secret weapon! While qualifications and past projects are important, there’s nothing quite like witnessing a landscape design company in action. Seeing an active job site allows you to get a firsthand glimpse of their work ethic, project management skills, and the overall quality of their work. Making the Request: What to Look For: Beyond the Site Visit: While not every company may be able to accommodate a site visit request, it’s definitely worth asking. Seeing a landscape design company in action can be a valuable tool in your decision-making process. By witnessing their work ethic, craftsmanship, and project management skills firsthand, you gain greater confidence in selecting the company best equipped to transform your landscape vision into a stunning reality. By following these steps and considering factors like experience, qualifications, communication, trust, budget compatibility, and environmental practices, you can choose the best landscape design company that aligns with your vision and requirements. Conclusion Transforming your outdoor space into a functional and aesthetically pleasing haven requires careful planning and the expertise of a qualified landscape design company. By following the steps outlined above, you’ll be well-equipped to navigate the selection process with confidence. Remember, a successful project hinges on a clear vision, thorough research, and selecting a company that aligns with your needs and design aesthetic. With a
How to Plan Your Outdoor Living Space
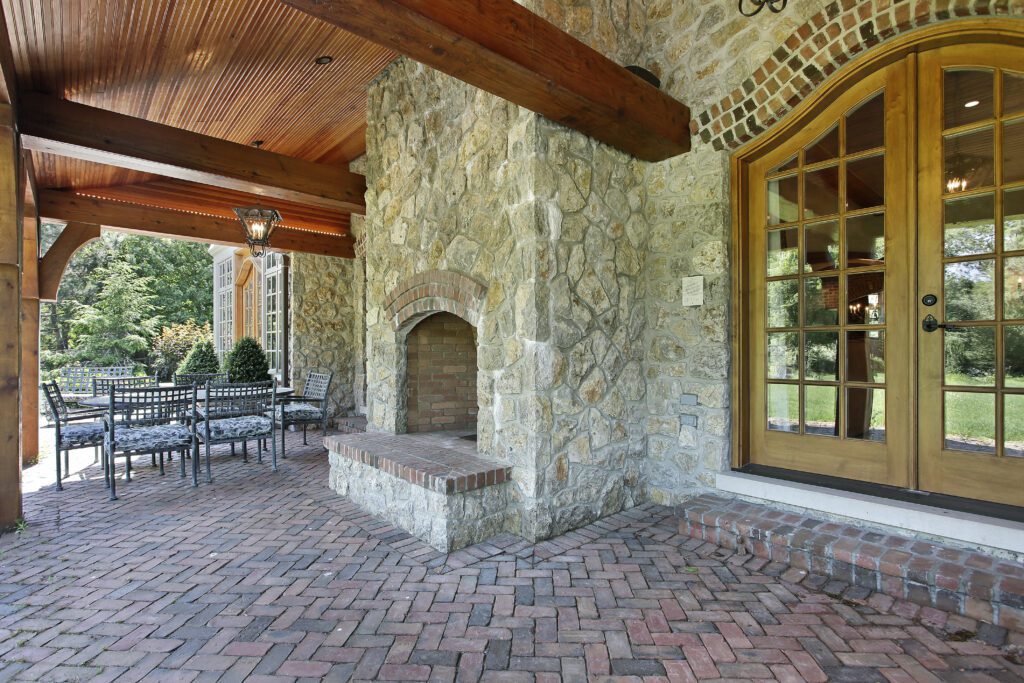
Outdoor living spaces have become increasingly important in today’s lifestyle. They offer a retreat from the hustle and bustle of indoor life, providing opportunities for relaxation, entertainment, and connection with nature. Beyond just being a place to unwind, outdoor areas serve as extensions of our homes, reflecting our personal style and enhancing the overall quality of life. In a world where stress is at an all time high and time spent indoors is often excessive, having a well-designed outdoor space can significantly improve mental and physical well-being. Whether it’s a cozy patio for morning coffee, a vibrant garden for meditation, or a spacious deck for family gatherings, outdoor living spaces play a vital role in promoting a healthy and balanced lifestyle. Starting to plan your outdoor living space is an exciting journey that requires careful consideration and attention to detail. It involves assessing your needs and desires, setting a realistic budget, and designing a layout that maximizes functionality and aesthetics. Seeking professional guidance from professional landscape designers or contractors can provide valuable insights and ensure that your vision is brought to life effectively. Throughout the planning process, it’s essential to stay flexible and open-minded, allowing room for adjustments and refinements as you go. By taking a systematic approach to planning, you can create an outdoor oasis that not only meets your needs but also adds value and enjoyment to your home for years to come. Assessing Your Needs and Desires Identify Your Goals and Priorities The first step in planning your outdoor living space is to clearly define your goals and priorities. Consider what you hope to achieve with your outdoor area. Are you looking to create a space for entertaining guests, a tranquil retreat for relaxation, or a functional extension of your indoor living space? Identifying your primary objectives will help guide the design process and ensure that your outdoor space meets your specific needs and desires. Consider Your Lifestyle and Style Preferences Your lifestyle and personal preferences play a significant role in shaping the design of your outdoor living space. Take into account how you and your family typically use outdoor areas. Do you enjoy cooking and dining outdoors, or do you prefer lounging and reading in the sun? Consider activities you enjoy and features that would enhance your outdoor experience. Additionally, think about your aesthetic preferences in terms of style, color schemes, and materials. Whether your taste is modern and minimalist or rustic and cozy, incorporating elements that resonate with your personal style will ensure that your outdoor space feels like a true reflection of your personality. Evaluate Your Outdoor Space Assessing your outdoor space and its potential involves taking a critical look at the size, layout, and existing features of your outdoor area. Consider the shape and dimensions of the space, as well as any natural elements such as trees, slopes, or bodies of water that may influence the design. Take note of any existing structures or amenities that you’d like to retain, modify, or remove as part of your renovation plans. Additionally, evaluate factors such as sun exposure, wind patterns, and privacy concerns that may impact the usability and comfort of your outdoor space. By carefully evaluating your outdoor area and its potential, you can make informed decisions that maximize its functionality and enhance its overall appeal. Setting A Budget Determine Your Project Budget Before diving into the planning process, it’s crucial to establish a realistic budget for your outdoor living space project. Start by evaluating your financial situation and determining how much you’re willing and able to invest in the project. Consider factors such as your current savings, available financing options, and any other financial obligations you may have. Be honest with yourself about what you can afford, taking into account both the upfront costs of construction and installation as well as any ongoing maintenance expenses. Allocating Funds to Different Elements Once you’ve determined your overall budget, it’s time to allocate funds for different elements of your outdoor living space. Consider what features and amenities are most important to you and prioritize your spending accordingly. Allocate a portion of your budget for your most essential elements such as hardscaping, landscaping, and furniture, while also setting aside funds for splurge features or upgrades that you may want to include. Be sure to leave some flexibility in your budget for unexpected expenses or changes to the project scope. Research Costs for Outdoor Living Spaces Researching the costs of materials and labor is an essential step in setting a budget for your outdoor living space project. Take the time to research the prices of materials such as decking, pavers, plants, and outdoor furniture, as well as the costs of hiring contractors or landscapers to complete the work. Get quotes from multiple suppliers and contractors to ensure that you’re getting a fair price and compare prices to stay within your budget. Keep in mind that the costs of materials and labor can vary depending on factors such as location, project complexity, and quality of materials, so be sure to account for these factors when setting your budget. By carefully researching costs and allocating funds strategically, you can ensure that your outdoor living space project stays within budget while still achieving your desired results. Design Your Outdoor Space Creating a Functional Outdoor Living Space Layout Designing the layout of your outdoor space is a crucial step in creating a functional and inviting environment that suits your needs. Consider how you intend to use the space and what activities you’ll be engaging in. Divide the area into zones based on different functions such as dining, lounging, cooking, and gardening. Arrange these zones in a way that facilitates easy movement and interaction between them, taking into account factors such as traffic flow, privacy, and views. Pay attention to the natural features of your outdoor area, such as sunlight patterns and existing landscaping, and incorporate them into your layout to enhance the overall design. Select Materials and Furnishings Choosing the right
Geogrid in Retaining Walls: Everything You Need to Know
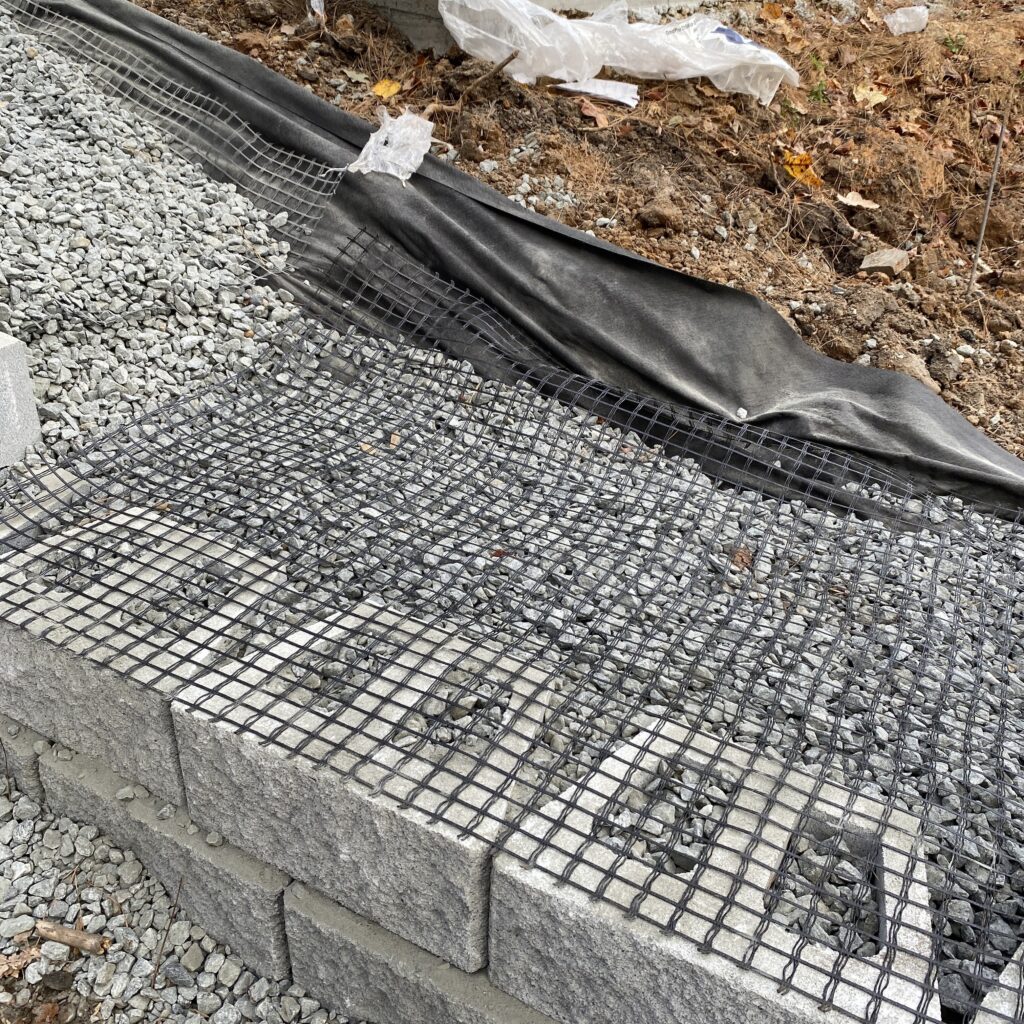
Geogrid is an innovative and versatile materials designed to reinforce soil structures, making them particularly valuable in enhancing the performance of retaining walls. These materials typically consist of a grid-like configuration of polymers or other durable materials. Geogrid in retaining walls functions by providing additional tensile strength to the soil, thereby improving its stability and load-bearing capacity. When integrated into the construction of retaining walls, geogrid acts as a supportive framework that distributes forces more evenly, reducing the risk of wall failure and promoting long-term structural integrity. Their effectiveness lies in their ability to mitigate the potential challenges associated with soil pressure, erosion, and settling, making them a vital component in the successful reinforcement of retaining walls. Retaining walls play a crucial role in providing stability to landscapes, especially in areas with changes in elevation. The primary function of a retaining wall is to resist the lateral pressure exerted by soil, preventing erosion, slippage, or collapse. Without proper reinforcement, retaining walls may be susceptible to structural failures, compromising their ability to support the retained soil. Reinforcement becomes essential to enhance the overall strength, durability, and performance of retaining walls, ensuring they effectively withstand the forces exerted by the surrounding terrain. Does My Retaining Wall Need Geogrid? How Tall Can a Retaining Wall be Without Geogrid? Geogrid isoften recommended for taller retaining walls or walls subjected to significant lateral forces. A taller wall would be any wall of over 3’-4’ in height but there are some considerations to make: How to Install Geogrid in Retaining Walls What are the Benefits of Using Geogrid in Retaining Walls? Improved Structural Integrity and Stability: Geogrid contributes significantly to the enhanced structural integrity and stability of retaining walls. By reinforcing the soil structure, geogrid acts as a supportive framework that distributes forces more evenly. This reinforcement helps prevent issues such as settlement, tilting, or overall failure of the retaining wall. The added tensile strength from geogrid ensures that the wall remains structurally sound and resilient against the pressures exerted by the retained soil. Increased Load-Bearing Capacity: One of the primary benefits of incorporating geogrid into retaining walls is the substantial increase in load-bearing capacity. Geogrid distribute the load over a larger area, reducing the pressure on individual components of the wall. This results in a more efficient distribution of forces, allowing the retaining wall to support heavier loads without compromising its stability. The improved load-bearing capacity is especially valuable in scenarios where the wall is subjected to surcharge loads or other external forces. Prevention of Soil Erosion and Wall Displacement: Geogrid plays a crucial role in preventing soil erosion and displacement behind the retaining wall. The grids stabilize the soil, reducing the risk of erosion caused by water runoff or other environmental factors. Additionally, geogrid resist lateral pressure, minimizing the likelihood of soil pushing against the wall and causing displacement. What is the Difference Between Geogrid and Geotextile in Retaining Walls? While both geogrid and geotextiles are geosynthetic materials used when building a retaining wall, geogrid is structured as a grid for soil reinforcement, while geotextiles are fabric-like materials with diverse functions such as filtration, separation, and erosion control. The choice between when to use geogrid or geotextile depends on the specific needs of the project and the desired outcomes in terms of soil stabilization and structural support. Geogrid Geotextile: Conclusion To sum it up, incorporating geogrid into your retaining wall construction is akin to empowering your walls with an impressive boost. Picture these grid-like structures as the superhero sidekick for your walls, providing the extra muscle needed to tackle challenges such as soil pressure and erosion head-on. Geogrid becomes the key ingredient ensuring that your walls not only bear more weight but also stand resilient, preventing issues like sinking or tilting. As you embark on your retaining wall construction projects, don’t forget to factor in the importance of geogrid. These incredible reinforcements act as a support system for your walls, allowing them to thrive under various conditions. Just like following a recipe for success, adhering to the right steps for incorporating geogrid, considering the soil type and the height of your wall, ensures that they seamlessly perform their superhero duties, providing strength and stability to your retaining walls. So, whether you’re building walls to level landscapes or create beautiful terraces, remember that geogrid is the unsung heroes that make it all possible. They elevate your construction endeavors, ensuring that your retaining walls not only endure but thrive in the face of challenges.
What is The Best Retaining Wall Material for You?

When choosing the best retaining wall material, several key factors should influence your decision. Each material comes with its own set of characteristics, and understanding these considerations will help you make an informed choice. By carefully weighing these factors, you can select a retaining wall material that not only meets your practical needs but also aligns with your aesthetic preferences and budget considerations. Choosing the appropriate retaining wall material is paramount in preventing potential failures, as the wrong material may lead to structural weaknesses, inadequate support, or insufficient drainage, compromising the overall integrity of the retaining wall. Factors to Consider when Choosing Retaining Wall Materials Using Natural Stone as a Retaining Wall Material Natural stone offers a diverse range of options for creating stunning and enduring retaining walls. Some popular choices include: Advantages of Natural Stone Retaining Walls: Natural stone retaining walls offer several advantages that make them a preferred choice for many landscaping projects: Considerations When Using Natural Stone (Cost, Installation Challenges): While natural stone retaining walls offer numerous benefits, there are important considerations to bear in mind: Interlocking Concrete Blocks as a Retaining Wall Material Interlocking concrete blocks have emerged as a modern and innovative choice for constructing retaining walls. These blocks are designed to fit together seamlessly, creating a stable and cohesive structure. Unlike traditional building methods, interlocking blocks offer a straightforward and efficient solution for retaining wall construction. The modern design of these blocks has revolutionized the approach to landscaping and provides several advantages over conventional materials. When incorporating interlocking blocks into your retaining wall design, the backfilling process becomes a critical consideration to ensure the stability and functionality of the structure Ease of Installation and Flexibility of Interlocking Concrete Blocks: Visual Appeal and Various Design Possibilities: Concrete Masonry Unit/CMU/Cinderblock Retaining Walls Concrete Masonry Units (CMUs), commonly known as cinderblocks, are a popular and versatile choice for retaining walls. CMUs come in various sizes and configurations, providing flexibility in design and construction. Concrete is favored for its strength, durability, and suitability for different applications in landscaping and construction. Strengths of Concrete Blocks as a Retaining Wall Material (Durability, Longevity): Design Options and Customization with Concrete: Cons of Using CMUs/Concrete Blocks for Retaining Wall While concrete masonry units (CMUs) or concrete blocks are a popular choice for retaining walls, there are some cons or drawbacks associated with their use. It’s essential to consider these factors when deciding on the most suitable material for your retaining wall. Here are the cons of using CMUs or concrete blocks: Timber Retaining Walls Timber is a popular choice for retaining walls due to its natural appeal, cost-effectiveness, and ease of installation. It is a type of wood that can be used in various landscaping applications, providing both functional support and aesthetic value. Timber retaining walls are constructed by stacking and securing wooden planks or logs to create a barrier that holds back soil and prevents erosion. This type of retaining wall is well-suited for a range of landscape designs, from more formal settings to informal and rustic environments. Benefits of Timber (Affordability, Versatility): Cons of Using Timber as a Retaining Wall Material Maintenance Tips for Timber Walls: While timber retaining walls offer affordability and visual appeal, proper maintenance is essential to ensure their longevity and structural integrity: Brick Retaining Walls Bricks have long been favored for creating a classic and timeless aesthetic in various architectural applications, and this extends to retaining walls. Using bricks for retaining walls imparts a sense of tradition and enduring charm to outdoor spaces. The distinct and warm appearance of brickwork can evoke a sense of history, making it an ideal choice if you are seeking a classic and enduring look in your landscaping. Benefits of Brick Walls (Timeless Appeal, Low Maintenance): Cons and Considerations of Brick Retaining Walls: What is the best rock for a retaining wall? The choice of the best rock for a retaining wall depends on various factors, and different rocks offer unique advantages. Ultimately, the best rock for your retaining wall depends on factors such as your specific landscaping needs, aesthetic preferences, budget considerations, and the environmental conditions of your location. Consulting with a landscaping professional can help you make an informed decision based on your unique requirements. One of the biggest deciding factors is availability of materials in your local area, especially when price is a concern. You could theoretically get any natural stone imported, but it will cost you. If you have multiple options available for your natural stone retaining wall project, consider this: What is the cheapest type of retaining wall? One of the most cost-effective types of retaining walls is often constructed using timber. Timber retaining walls are known for their affordability and versatility, making them a popular choice for budget-conscious projects. Here’s why: While timber is a cost-effective option, it’s essential to consider the longevity and maintenance requirements. Timber may require periodic maintenance to ensure durability, and its lifespan may not match that of more durable materials like concrete or natural stone. Therefore, the choice of the cheapest retaining wall should also align with your specific needs, aesthetic preferences, and long-term considerations. Conclusion Choosing the right material for your retaining wall is a crucial decision that involves balancing both functional and aesthetic considerations. The diverse options available offer a spectrum of benefits, allowing you to tailor your choice to the specific needs and design preferences of your landscape. From the enduring elegance of natural stone to the modern efficiency of interlocking blocks, each material brings its own set of advantages and considerations. Natural stone, such as granite or limestone, not only provides durability but also adds a timeless and sophisticated charm. Timber, while cost-effective, requires periodic maintenance but can offer a warm and rustic appeal. Concrete masonry units (CMUs) or cinderblocks present a modern and efficient alternative, allowing for easy installation and a clean aesthetic. Stone cladding or veneer can elevate the visual appeal of concrete blocks, combining durability with a natural look. Bricks, with their
How to Backfill a Retaining Wall
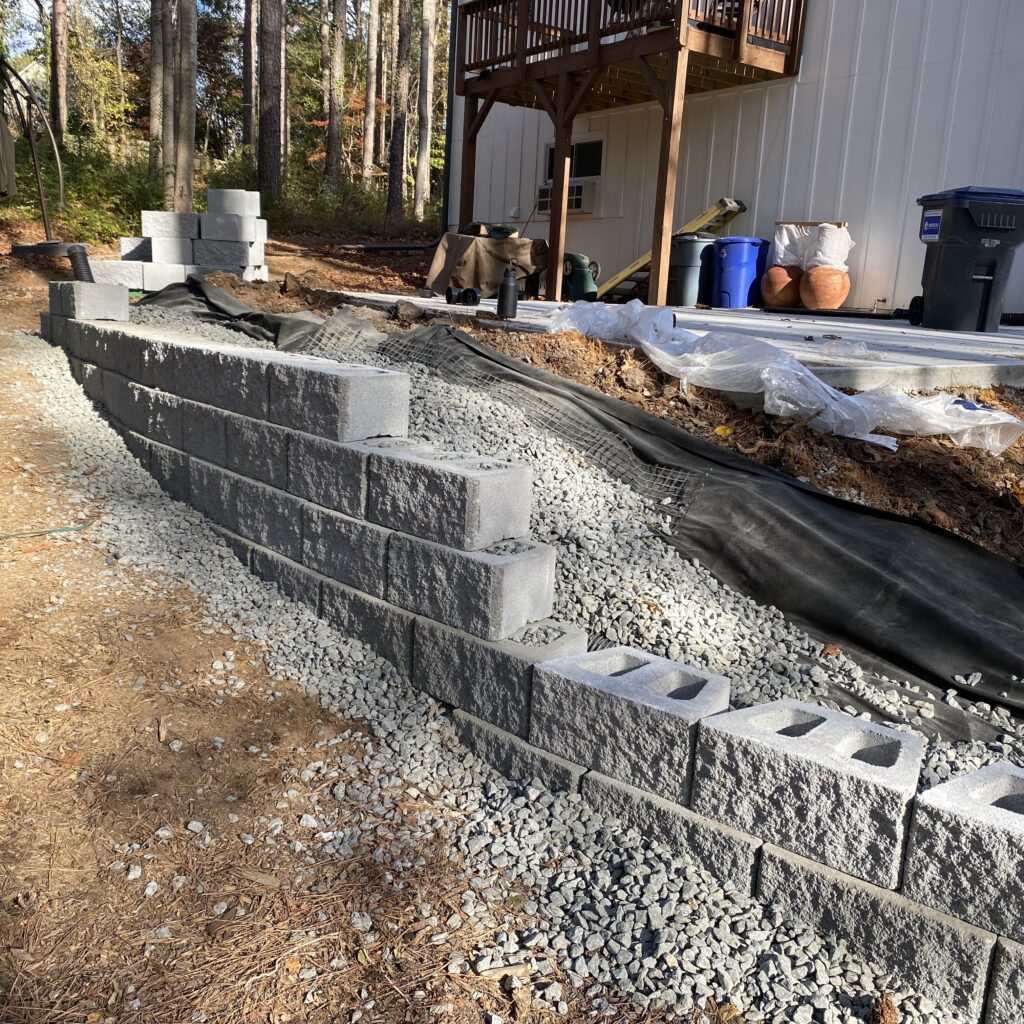
Backfilling serves as the support system behind the walls, providing essential lateral pressure that counteracts the forces exerted by the retained soil. Without adequate and well-compacted backfill, the structural integrity of the retaining walls is compromised, leading to potential issues such as tilting, bulging, or even total failure. Proper backfilling not only reinforces the walls against the pressure of the retained soil but also contributes to uniform settlement, minimizing the risk of differential settlement that could cause uneven stress on the structure. In essence, the backfilling process is foundational to the stability of retaining walls, acting as a crucial element in the overall structural design. In this in depth article, we’ll dive into how to backfill a retaining wall, the best material for backfilling as well as how far to go back with backfill material. The backfilling process involves placing and compacting soil behind the retaining walls, and its impact extends beyond stability to the realm of drainage. Efficient drainage is essential to prevent the buildup of hydrostatic pressure behind the walls, which could lead to wall failure. During backfilling, incorporating drainage features such as gravel layers or drainage pipes enhances the ability of water to move away from the structure. A well-executed backfilling process not only supports the structural load of the walls but also ensures effective drainage, addressing both the immediate and long-term considerations for the stability and performance of the retaining wall system. What is the best material for backfill of retaining wall? The selection of appropriate backfill material is a critical aspect of ensuring the stability and effectiveness of retaining walls. It begins with a thorough understanding of the soil composition on the site. Different soil types have varying characteristics, including cohesion, drainage, and compaction properties. The choice of backfill material should complement the existing soil, promoting compatibility and cohesion. Commonly used backfill materials include well-graded gravel or crushed stone, as they facilitate proper drainage and compaction. ¾” crushed stone with no fines, often referred to as clean stone, is considered highly effective for drainage due to its specific characteristics. The absence of fines, which are smaller particles like sand and silt, contributes to its exceptional drainage capacity. The larger size of the crushed stone particles enhances permeability. Water can permeate and move through the spaces between the stones quickly. This permeability is crucial for preventing water pressure buildup behind retaining walls, reducing the risk of hydrostatic pressure that could compromise the stability of the walls. The absence of fines means there are no smaller particles that could potentially clog the void spaces between the stones. In materials with fines, these smaller particles might compact over time, reducing drainage efficiency. Clean crushed stone maintains its permeability and drainage capacity over the long term. The larger size of the stones contributes to the stability of the backfill. The stones interlock with each other, creating a stable and well-structured foundation behind retaining walls. This stability is crucial for preventing settling and maintaining the structural integrity of the entire wall system. How to Backfill a Retaining Wall Core Filling Retaining Wall Blocks Do You Need Geotextile for Retaining Wall Backfill? Geotextile is a synthetic fabric material designed for various civil engineering and landscaping applications, including soil separation in backfilling behind retaining walls. When used for soil separation, geotextile serves as a barrier between the backfill material and the native soil. Here’s an elaboration on the role and benefits of geotextile for soil separation: In summary, geotextile plays a crucial role in soil separation during backfilling behind retaining walls. It contributes to effective drainage, stability, and long-term durability of the retaining wall system by preventing soil mixing, promoting load distribution, and minimizing erosion and weed growth. Proper installation and selection of geotextile are essential to maximize its benefits in retaining wall construction. How Far Back Should Retaining Wall Backfill Go? The depth to which backfill should go is a critical aspect of retaining wall construction, and a general guideline is to have a minimum depth of at least 12 inches. However, it’s important to note that this depth can vary based on site conditions and engineering considerations. The height of the retaining wall is a crucial factor. Generally, the backfill should extend to a depth that provides sufficient support for the wall, considering the load it needs to bear. Taller walls may require deeper backfill. Follow the recommendations provided by the engineering or design plans for the retaining wall. Design specifications will typically outline the required depth of backfill based on factors such as soil properties, wall material, and overall stability considerations. Conclusion Backfilling is an integral to the success and longevity of a retaining wall. The process involves careful consideration of various factors, from soil characteristics and compaction techniques to the incorporation of geotextile for optimal soil separation. As we’ve explored, the depth of backfill plays a pivotal role, with a general recommendation of at least 12 inches to provide the necessary support and stability. Ensuring proper drainage, preventing soil migration, and compaction are key elements in achieving a resilient retaining wall system.Hopefully after reading this guide, you can navigate backfilling with confidence. Remember that the success of your retaining wall project is not only measured by its structural integrity but also by its aesthetic appeal. Attention to detail in alignment, layering, and addressing corners and curves contributes to a visually pleasing landscape. As you embark on your journey of backfilling a retaining wall, consider it as the foundation of a sustainable and visually striking outdoor space. With meticulous planning, proper techniques, and a commitment to best practices, you can create retaining walls that stand the test of time, providing stability, effective drainage, and an enduring enhancement to your landscape. Happy backfilling!
How to Build A Terraced Retaining Wall
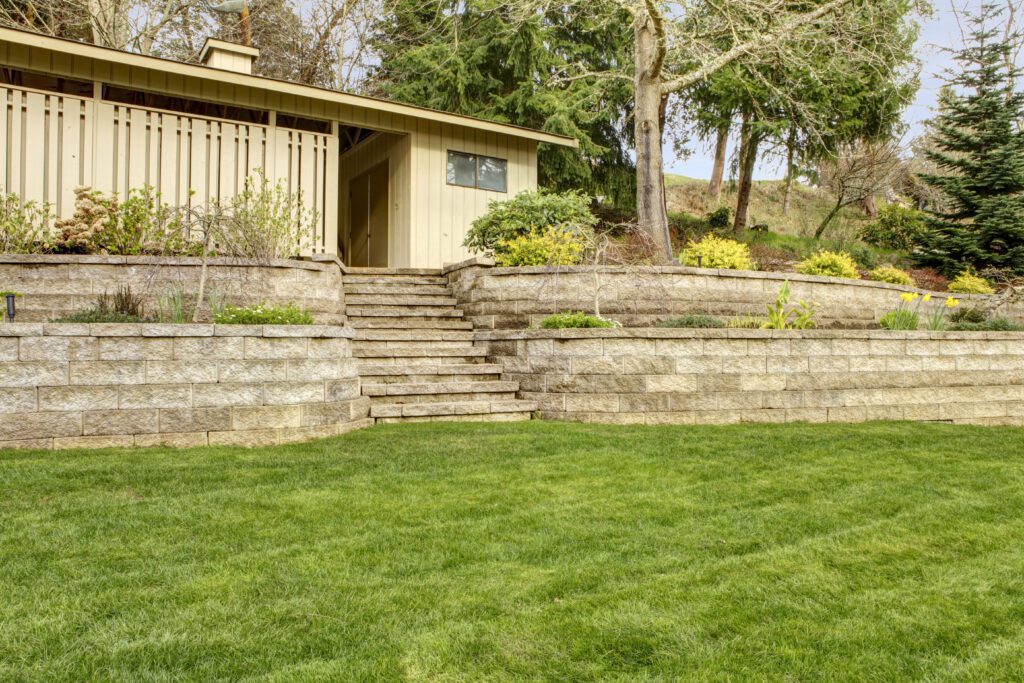
Terraced retaining walls serve a dual purpose, combining functionality with aesthetic appeal. The benefits of terraced retaining walls extend beyond their visual appeal. They play a crucial role in preventing soil runoff, controlling water drainage, and reducing the risk of landslides on sloped properties. Additionally, these walls can contribute to soil stability, creating a more secure foundation for structures and minimizing the impact of gravity on the landscape. In essence, terraced retaining walls are versatile and purposeful elements that harmonize the functional and aesthetic aspects of landscaping. If you want to build a terraced retaining wall, follow along for everything you need to know. Planning Your Terraced Retaining Walls The success of constructing terraced retaining walls hinges on meticulous planning, emphasizing the need for foresight and attention to detail. Proper planning is the cornerstone of a structurally sound and visually appealing project. Key considerations include assessing the site and soil conditions to understand the challenges posed by the terrain. This involves analyzing the stability of the soil, potential water drainage issues, and any other factors that may impact the integrity of the retaining walls. Important Design Considerations for Building a Terraced Retaining Wall Ensuring the proper spacing between upper and lower retaining walls is a critical consideration in the construction of terraced landscapes. It is essential that the distance of the upper retaining wall from the bottom retaining wall should be at least 2 times the height of the wall it is situated on top of. This guideline is paramount for preventing excess force on the bottom wall and maintaining the structural integrity of the entire system. By adhering to this distance requirement, you create a buffer zone that distributes the load effectively, mitigating potential pressure on the lower retaining wall. Additionally, it is advisable to prioritize the construction of the bottom retaining wall unless specific constraints prevent it. Building the bottom wall first establishes a stable foundation for subsequent walls and promotes a cascading effect, ensuring that each terrace is adequately supported. However, practical considerations such as limited access may necessitate adjustments to the construction sequence. Gathering Materials and Tools to Build a Terraced Retaining Wall Materials: Tools: Excavating and Base Preparation for a Terraced Retaining Wall Marking and staking out terrace levels ensure precision, while careful excavation and base preparation lay the foundation for the structural integrity of each terrace. These early stages are critical in creating a solid base that supports the retaining walls and ensures their long-term stability. Block by Block: Build a Terraced Retaining Wall Adding Drainage and Backfilling a Terraced Retaining Wall Conclusion The journey of building a terraced retaining wall is a testament to both the artistry and engineering involved in landscaping. From the initial assessment of site conditions to the meticulous construction of each tier, every step contributes to the creation of a harmonious outdoor space. The terraced retaining walls are more than structural elements; they are an embodiment of your vision and commitment to enhancing your surroundings. Invite the beauty of the terraced design into your daily life, creating moments of joy and connection with nature. Whether it’s the vibrant colors of new plantings, the cozy corners for relaxation, or the structural elegance of the retaining walls themselves, savor the fruits of your labor. The completion of a terraced retaining wall marks not just the end of construction but the beginning of a chapter filled with the delights of a transformed landscape. Enjoy your revitalized outdoor sanctuary to the fullest!
