How To Install a French Drain

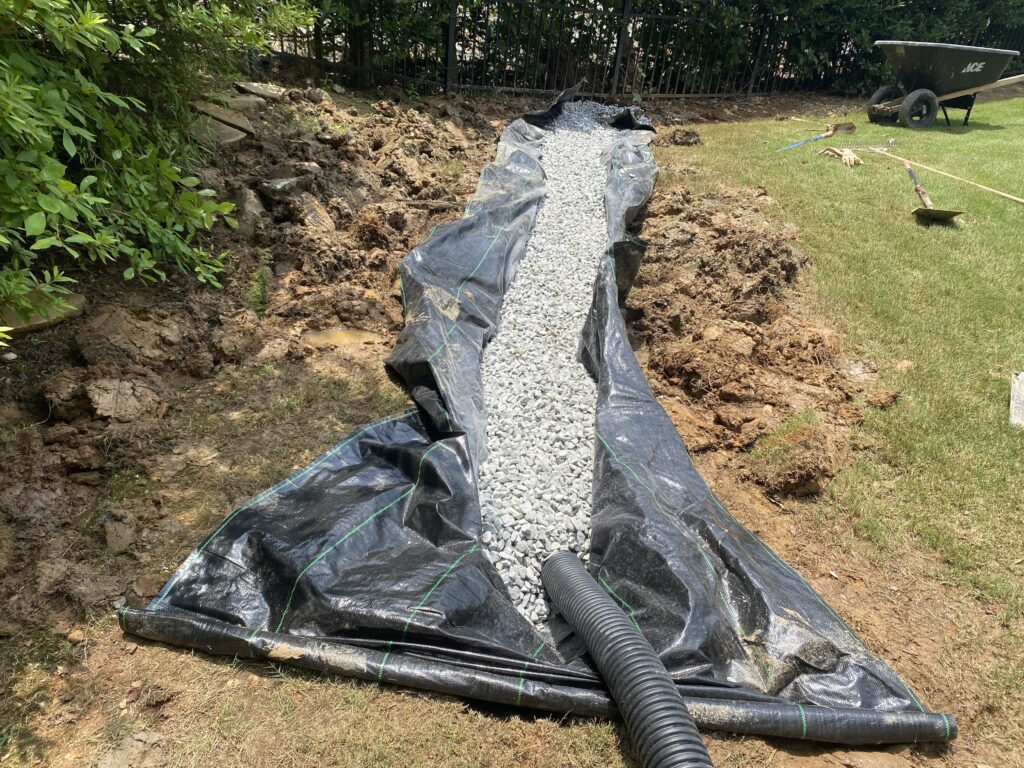
French drains, often heralded as the unsung heroes of effective drainage solutions, not only keep excess water at bay but also add an element of aesthetic organization to your surroundings. As a homeowner, you’ve likely pondered the idea of installing one of these ingenious systems, and here we present you with a comprehensive guide to demystify the process. When is a French Drain a Necessity? Essential Tools and Materials for French Drain Installation Before delving into the installation process, gather the necessary tools and materials: Step 1: Assess Underground Safety Start by thoroughly examining your underground environment. Be aware of the locations of wires, pipelines, and installations to avoid accidentally damaging them during excavation. Ensure there is ample space for the drainage system, keeping it at least one meter away from walls and fences to prevent future complications. Consider potential obstacles like tree roots and vegetation. Assess water sources, their volume, and whether they might be contaminated. Step 2: Check for Zoning Restrictions Some areas have restrictions on excavation and construction. Consult with local authorities to ensure compliance. While it may seem tedious, maintaining good relations with legal institutions is always beneficial. Additionally, discuss your plans with neighbors to avoid any disputes regarding water runoff onto their properties. Step 3: Determine the Ideal Slope For a French drain to function optimally, it must be installed on a downward slope to facilitate natural water flow away from the problematic area. If a natural slope is absent, you may need to create one. The general rule is 1 inch of slope for every ten feet of length. Consult with experts or surveyors if you’re uncertain about the slope’s adequacy. Step 4: Excavate the Trench Excavation is a critical step. The trench for a French drain is typically 6 inches wide and 18-24 inches deep. A trencher is the most efficient tool for this task, although it may require professional handling. If you opt for manual excavation, it will demand substantial effort. Size the trench according to your drainage needs and equipment dimensions. Step 5: Lay Landscape Fabric Once excavation is complete, line the trench with water-permeable landscape fabric. Leave at least 10 inches on either side to accommodate expansion. This fabric will prevent soil from entering the drain while allowing water to pass through. Step 6: Add Gravel Base Spread 2-3 inches of drainage rock evenly over the landscape fabric. This rock layer serves as the foundation for the drain. Step 7: Place Corrugated Drain Pipe Position the corrugated drain pipe atop the gravel, ensuring that drainage holes face downwards for optimal performance. Step 8: Cover with Drainage Rock Add more gravel to cover the pipe, leaving 3-5 inches of space between the gravel’s top and the trench’s surface. This prevents debris from entering the drain while promoting water flow. Step 9: Secure Landscape Fabric Fold any excess landscape fabric over the gravel to prevent soil intrusion while facilitating water passage. Step 10: Complete the Trench Refill the remaining trench with displaced soil. You can opt to lay sod or decorative stones over the trench for a more visually appealing finish. If you choose the latter, consider adding a curve to enhance aesthetics. In Conclusion These comprehensive steps empower you to install a French drain effectively. While it’s possible to undertake this project on your own, seeking professional assistance is advisable for optimal results. Whether you choose DIY or professional installation, this guide equips you to improve your outdoor space and manage excess water efficiently.
How To Install A Paver Driveway

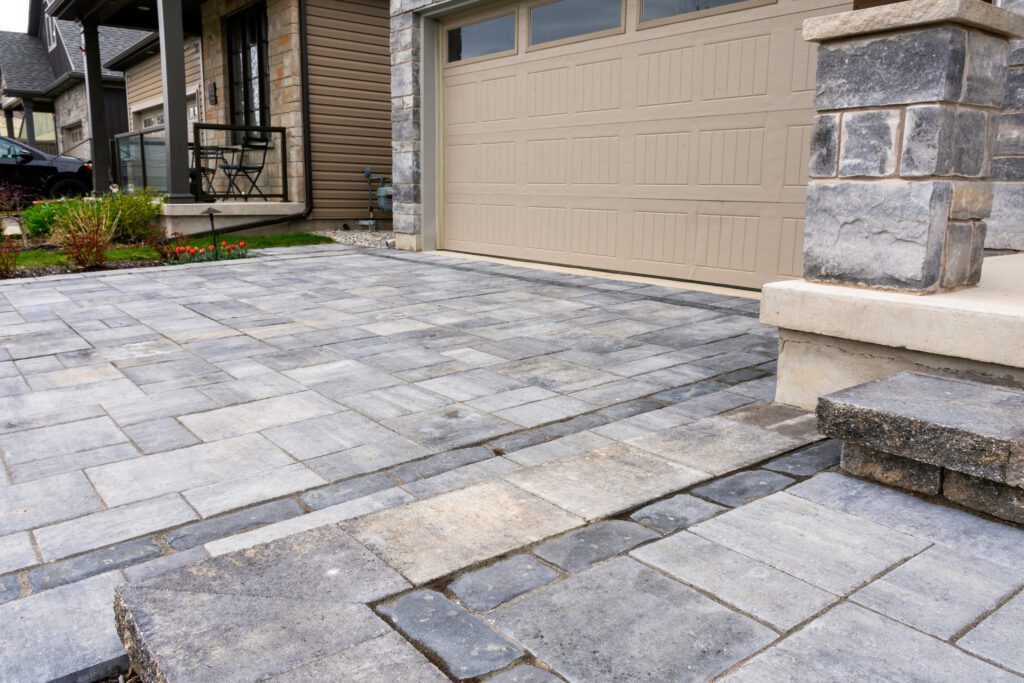
Dreaming of a property with an enchanting walkway and a driveway that stands the test of time? While it may seem like a daunting task, especially if you’re unsure where to begin, enhancing your property, particularly your driveway, is a gratifying achievement. The process may appear complex, but with the right guidance, it becomes a fulfilling journey towards a more inviting and appealing home. Fortunately, the internet offers a wealth of ideas and designs to align with your preferences. The Trendsetter: Paver Driveways If you’re still exploring the perfect driveway improvement, consider the paver driveway, a trendsetter that’s gaining momentum. It’s an investment well worth your time, money, and effort. Every cent counts, so why not allocate it to something both fashionable and functional? Adding pavers to your driveway not only enhances its visual appeal but also offers numerous advantages. Getting Acquainted with Pavers Pavers, also known as paving stones, are construction units crafted from materials such as cement, brick, or natural stone. They are the ideal choice for outdoor flooring, finding use not only in driveways but also in pool decks, patios, walkways, and even fire pits. Pavers are a practical choice for driveways due to their durability and low maintenance requirements. Their installation instantly elevates your property’s curb appeal, increasing its value. While the initial cost may seem higher than traditional asphalt or concrete, a paver driveway proves cost-effective in the long run, demanding fewer repairs and maintenance. How to Build a Paver Driveway Constructing a paver driveway follows a straightforward process that demands meticulous planning, some elbow grease, and a dash of patience. The end result? A cost-effective, long-lasting, and aesthetically pleasing driveway that meets your needs and desires. Step 1: Start with a Solid Plan Begin your journey by crafting a well-thought-out plan. Determine the precise location for your paver driveway and create a scaled drawing using graphing paper. Consider factors such as the number of family cars and your desired driveway length (typically around eighteen to twenty feet). A well-crafted plan ensures a successful paver driveway project. Step 2: Gather Essential Materials Prepare the materials required for the project in advance to ensure smooth progress. You’ll need items such as rope, strings, wooden stakes, paver restraints, gravel, sand, a rubber mallet, steel spikes, a carpenter level, straight lumber, a plate compactor, measuring tape, a straight edge, a masonry saw, and safety equipment. Safety should be a top priority throughout the process. Step 3: Excavation and Compaction Excavate the ground to a depth of at least 12 inches. Compact the excavated soil thoroughly using a hand tamper to prevent shifting over time. Step 4: Lay Geotextile Fabric Lay geotextile fabric to facilitate efficient water drainage without disturbing the soil underneath. This fabric is vital for driveways as it prevents soil movement and enhances paver durability. Step 5: Create a Gravel Base Add a 8″-10″ layer of gravel to the compacted soil. Adjust the thickness to ensure a smooth and level surface without bumps or dips. Step 6: Install Edge Restraints Place edge restraints around the perimeter of your driveway project and secure them in the ground using 12″ spikes. Even if your driveway has irregular shapes, you can adapt the restraints to maintain your chosen design. Step 7: Layer Sand and Lay Pavers Add about 1 inches of sand on top of the gravel base. Carefully level the sand using a straight board. Begin laying the pavers in your desired pattern, ensuring they fit snugly against each other. Adjust pavers as needed, and cut them to size if necessary. Step 8: Compact and Finish Use a plate compactor to tamp the pavers into the sand, repeating the process at least three times to ensure a secure fit. Spread polymeric sand on top of the pavers and sweep it into the gaps between them using a broom. Congratulations, you’ve successfully constructed your paver driveway! As you follow these steps, you’ll have a beautiful, durable, and versatile addition to your property. It not only enhances its aesthetics but also adds value, making your home the envy of your friends and neighbors. Enjoy the Process Building a paver driveway is a significant home improvement project that requires your time, effort, and investment. With the right approach, knowledge, and patience, you’ll create a driveway that not only meets your needs but also adds long-lasting beauty and functionality to your property. If you find the process challenging, don’t hesitate to seek professional assistance. They have the expertise to ensure your paver driveway turns out just as you envisioned. So, why wait? Start planning your paver driveway today, and enjoy the beauty and benefits it brings to your home.
